Winter Was Coming
Dave was finally becoming stable enough that we could start focusing our energies a bit back on our home build. Every single step seemed to take about 4 times as long as it did just weeks ago, but we made a list of the most critical things that needed to get done to get our home weather proof before the winter weather came and focused on those.
And, if winter coming wasn’t enough, Dave had another brain procedure scheduled for mid October. The push was on, but in the middle of all the work, we stopped to have family pictures with our kiddos who had been so helpful during our build. We couldn’t have done it without them 🙂

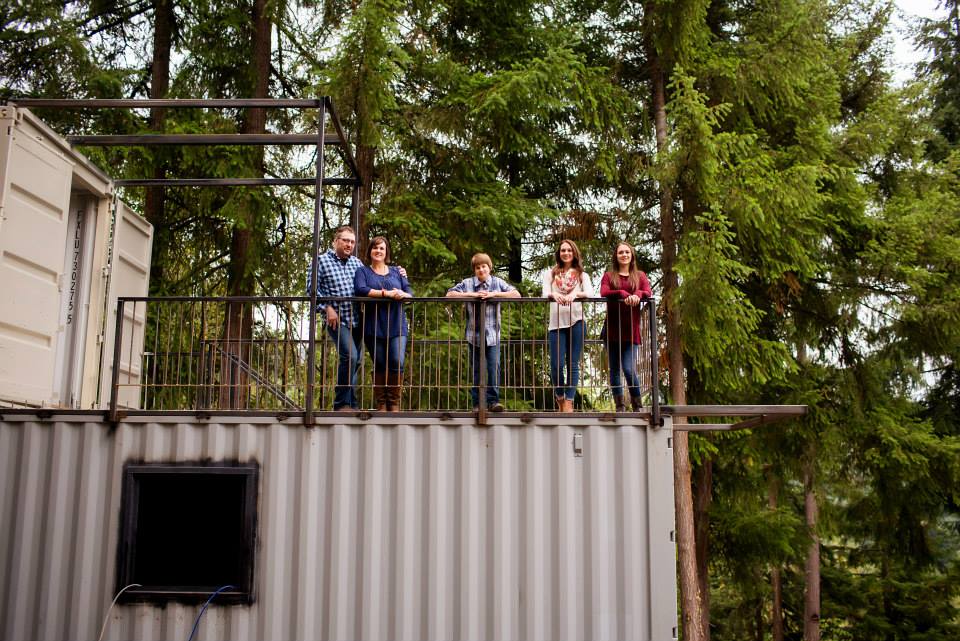
Family & Friends ~ Our Heros!
We were so blessed to have family and church family step up and help us. It was almost a full time job for me when we were at our property to keep Dave safe. If the family wouldn’t have helped us, we would have ended up with 2 rusted out shipping containers going into spring and not the home that we were able to get dried in before winter came. With our home dried in, our hope was that Dave would be able to continue to work on it as part of his therapy and as he got better and stronger.
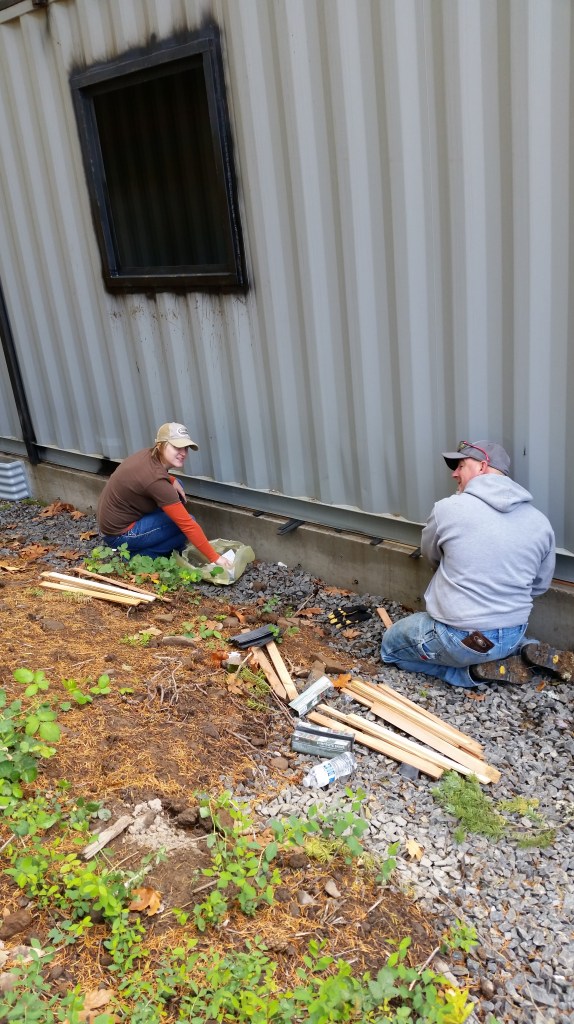
Sealing the Crawl Space
We started by finishing up the foundation. As I mentioned in an earlier blog post, the side walls of the container did not touch the concrete foundation. This was an error on our engineers part, but we problem solved solutions and used cedar shims to wedge between the container I-Beam and the foundation wall. By shimming, we were able to displace the massive weight of the containers. Before shimming, the weight of the containers on our foundation were focused in the 4 corners, causing damage to the back of our foundation. Thankfully, we were able to repair that damage before Dave’s bleed and the foundation continued to fail.
After we shimmed all the way around the foundation, we went along and used a really strong caulk called Volcom and placed a large bead that weather could run off of instead of seeping into the crawl space in the foundation. While the process was tedious and time consuming, it has been worth it. We successfully displaced the weight properly and also have a very dry crawl space under our home. Our foundation has not experienced any settling or cracking since we put the fixes in place almost 4 years ago 🙂
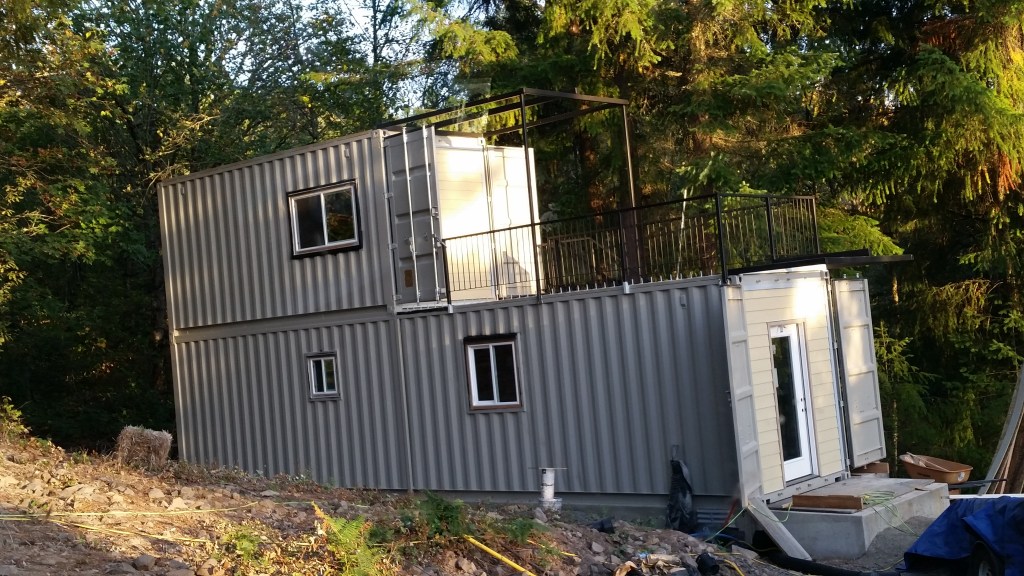
Painting Our Rusty Boxes
Initially, Dave and I had planned on painting the containers ourselves. We already had our paint colors chosen and in the early summer, this would have taken us a day at best. But with his bleed, this was another project that now seemed completely overwhelming and daunting. Dave would not be able to help much, which would leave the logistics of getting the job done to me. Again, our church family came to our rescue, and during the work week, while Dave sat in his lawn chair and supervised (like he was the boss 😉 ) a painter that our church provided painted the outside of our containers. This paint protected all of our raw metal from rusting and also prepped the containers to install our shear walls and windows.
Side note: Our original paint color was called Intellectual Gray. We have since repainted our containers a bright, sassy orange that we feel represents our personalities and our home much better 😉


Installing The Shear Walls
Our shear walls, or walls that sealed off the end of the containers were thankfully completed by a carpenter that our church family hired for us. He framed, sheeted, sided and installed the doors on both the upper and lower containers. Without his help, we would never have gotten this portion done before the rains came. The most challenging part of the shear walls was connecting the wood to the metal container. We used pressure treated, but prior to placing the wood against the metal and securing it with lag bolts, we placed a moisture barrier between the metal and wood to prevent condensation transfer that is common in containers.


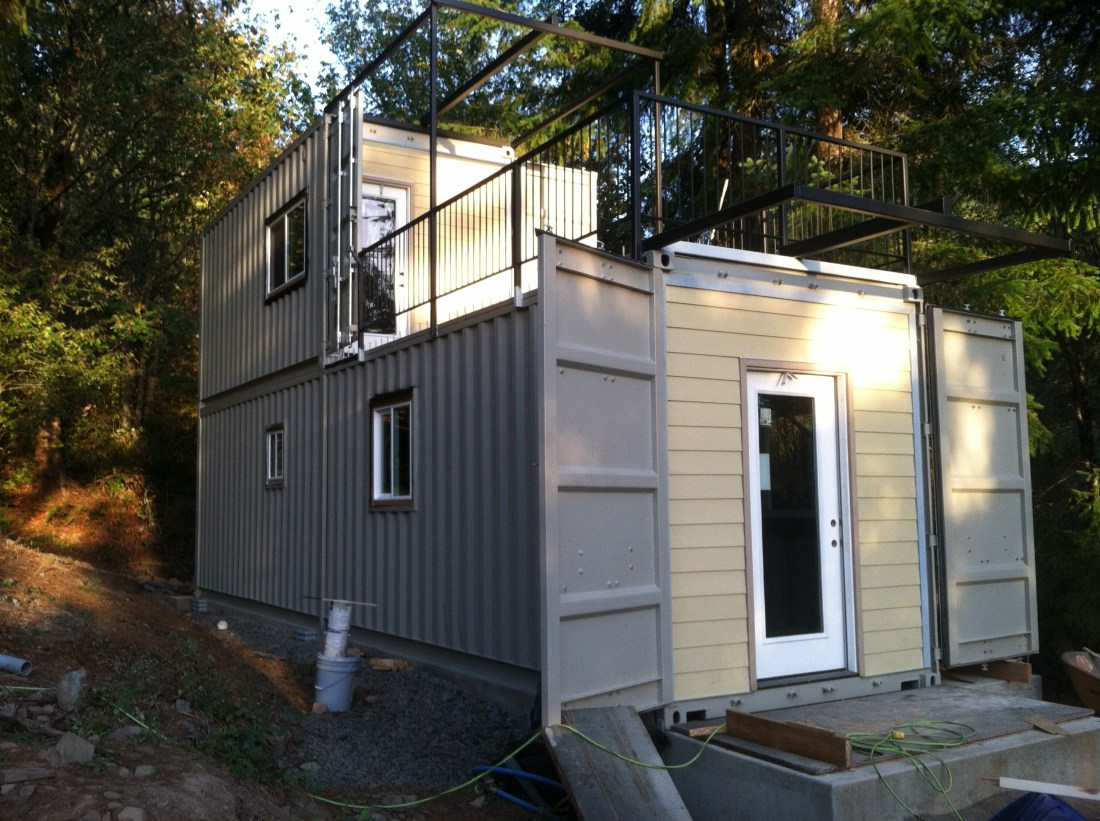
Installing The Windows
Our hope had been that the carpenter was going to be able to install our 7 windows also. But unfortunately, the shear walls took him longer than we expected and we had to start the process of installing the windows ourselves. We were up against a time frame; in mid October, Dave was scheduled for another Cerebral Angiogram. We needed to have our home dried and secured prior to this procedure, because as always, when they go into the brain, things can change quickly.
Installing the windows was a major process, but thankfully, our kids helped us out alot on the prep work. First, we had to pre-drill the screw holes into the metal frame that Dave had installed earlier in the summer. This was a time consuming and tough job for me and the kids. Because of the force and exertion it took to drill through the metal, Dave couldn’t do it. It put to much pressure on his head. But, Dave still had high expectations on how he wanted the job completed. We pre-drilled screw holes every 6 inches (overkill in my opinion, but he was the boss 😉 ). Once the holes were completed, we wrapped the entire window frame in moisture barrier tape.
And then, slowly, ever so slowly, Dave, myself a couple of our kiddos, installed the ground floor windows one by one. The windows were screwed from the inside to prevent any additional holes that water could seep into from the outside. Once a window was installed and screwed in, we placed cedar trim around the outside of the window to fill any gap between the window itself and the metal frame. We secured the cedar trim with Volcum instead of fasteners to again, preventing any additional holes for water to enter our home.
It took us almost a day a window to install our 7 windows. We learned the process on the ground floor windows, and then prayerfully installed the three 2nd floor windows. This is where Dave’s sudden Houdini personality was both a blessing and a curse. He had zero fear of standing on the very top of our 12 foot ladder, yes, where it says not to stand, unable to feel his right side and installed those windows like the amazing man he is. I stood inside the container leaning out the window holding onto him and assisting with handing him what he needed to get this process over as quickly as possible.


Dave’s Perseverance and Never Give Up Attitude
Dave had both on a level I had never witnessed or experienced up to this point in my life. 8 shorts weeks ago, he had almost died on our property. On October 14th, he, in complete exhaustion from having worked at his new pace for 6 of the last 8 weeks, smiled his new crooked smile with a sense of accomplishment that neither of us had felt up to this point.
Yes, we had successfully sealed our shipping containers so that they could become a home, but we had done in it in spite of all of the obstacles the past 2 months had thrown at us. Together, we knew that we could accomplish anything. What seemed impossible, was no longer impossible. What seemed improbable, had just been school on what Dave & Jaimie, together can do if we put our minds to it.
We were well on our way to making our containers a home!
Still Adventuring,
Jaimie & Dave

Hey Cousin,
Seen the video about your “tiny” house on YouTube. It turned out spectacular. I will leave my info down below.
Talk to you later! Also, congratulations!
LikeLike
Isaiah ~ Thank you! I didn’t see your information, but drop me an email at thattinylifelove@gmail.com 🙂 I would love to catch up! Hugs!
LikeLike