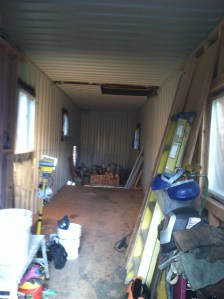
Finally!!! We were done (enough) with the outside of our shipping container home that we were ready to move inside and start creating a living space inside our cold metal boxes. It was December and icicles hung from the roofs of our containers (literally). Shipping containers transfer condensation, and in our SW Washington location, there is so much moisture in the air, that we knew we were going to have to be very diligent as we built our interior to protect against future moisture and mold problems.
A Wood Box
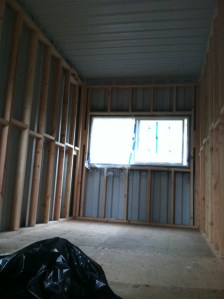
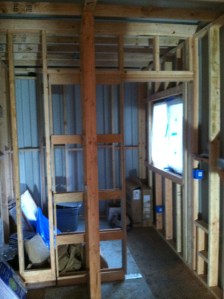
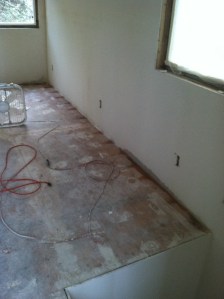
Our shipping containers are structurally much stronger than a stick built home, for obvious reasons, and so we were able to use 2 x 4 material instead of standard 2 x 6 material to frame our home. We were building our home to code and it was fully permitted. Our framed wood walls were 16” on center, standard code, but we needed to make sure that they didn’t touch the metal shipping container at any point. To accomplish this, we used the D ring tie downs that are standard in containers and use bailing wire to stand our walls 1” off of our container walls.


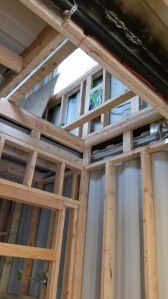
Laying Out Our Tiny Home
Our bathroom walls, and the stairwell framing were critical as we framed the interior. Our cabinets were already purchased and in storage, as was our spiral stairwell. As we framed the bathroom walls, we needed to be very accurate so that the final design matched up to our pre-fabbed design.
This was a challenge, because we had laid out our interior and cut our window openings, installed our windows and frames, purchased our cabinets and fixtures all before Dave’s ICH. Working through the same design 3 months later and checking and rechecking for accuracy was a difficult and time consuming process, but we accomplished it 🙂
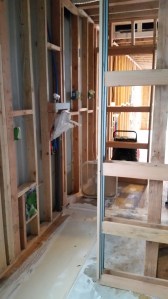
Electrical & Plumbing
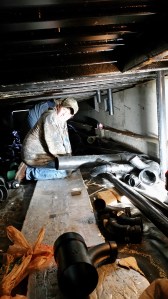
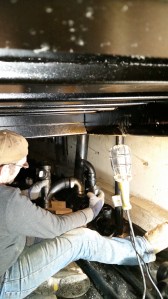
Once our walls were framed in, we started installing our roughed in electrical and plumbing. We did all of this ourselves and the reduced wall spaces (2 x 4 instead of 2 x 6) created some challenges, At Least we only had 1 bathroom, a kitchen and a laundry area to plumb in 😉 Our shipping containers sit on a 3’ foundation, so we had plenty of room underneath the house to work on our drains and venting for our plumbing.
I wanted to make sure that we had plenty of electrical outlets in our home, and they are literally placed about every 5 feet on the interior 🙂 I had personally never done any electrical work, but by the time we were through, I had learned how to drill holes in the studs to chase wire, and installed most of the standard electrical outlets. Dave installed the oven, dryer and hot water heater outlets and was an excellent electrical teacher 😉


There is one thing that we wished we would have known/realized during our rough in, and that is to we wished we have put a recessed electrical box/outlet in for our oven. When we installed our oven during the final phase of the build, it would not sit flush against the wall. This could have been prevented if we had realized and installed a recessed box. Just an FYI for you and something we wished we could have done over.
Spray Foam Insulation
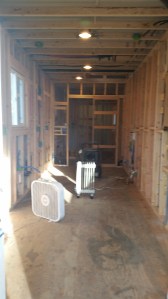
Once our framing, electrical & plumbing were all inspected and we were given the green light to proceed, we were ready for our insulation to be installed. This is something that we couldn’t do ourselves and had to contract it out. Prior to having the insulation installed, we rented an industrial dehumidifier and ran it for a week to dry out the interior of our shipping container. Our wood wall studs were saturated with moisture, just from condensation in the air and we didn’t want that moisture sealed in once the foam was sprayed. Insulation is very expensive, and for our 400 sq ft, we paid $7,000 – ouch! The insulation sealed the space between the metal container and the wood framed walls, and eliminates any moisture or condensation problems that we could have had.

We did run into 1 issue with our insulation installer – they failed/got lazy and didn’t shoot foam down into the walls space between our 20’er and 40’er. We didn’t initially realize this initially, but once our sheetrock was installed and was drying, there was so much additional moisture inside the containers that the bottom of the walls started to mold within 24 hours. We had to cut out the bottom of the sheet rock and also a 12” area around the perimeter of our bedroom floor to dry the area out. Thankfully, our insulation installer came back and sprayed into those areas. But oh my, it created so much additional work and set us back a couple of weeks as we had to fix their mistake.

It took us about 12 weeks to frame, rough in our utilities, pass inspections, dry out the interior, insulate and sheetrock. It was a slow and tedious process, but there was such a sense of satisfaction we had from doing 90% of the work ourselves 🙂 Thankfully, Dave was getting better each and every day and our shipping containers were actually starting to look like a home!


Enjoying the journey…
Jaimie & Dave

I just had say what a beautiful story! That said your home is one of the most beautiful container /tiny home I’ve seen. I love the deck and love how you see part of the outside stairs. ( that might sound weird but they do add a neat layer. Thanks for sharing!
LikeLiked by 1 person