Choosing Forever on the Deck of Our Shipping Container Home

A Simple Proposal

On a sunny, winter afternoon in February, on a wooden plank laid across two pieces of log, overlooking our valley and as we took a lunch break from working on our home, Dave asked me to be his wife.  It wasn’t fancy, the ring wasn’t huge, he didn’t get down on one knee. He grabbed my hand and looking at our valley, he asked me if I would be willing to spend the rest of my life with him. It was that simple.

20160115_140728
He was going to be mine FOREVER!!!

We had been through so much, and we were still in the battle, but we knew we were meant to be together forever.  Even if I wasn’t Dave’s wife and Dave wasn’t my husband, we were so much better together than apart. As we looked over our valley together, I said yes, I would be honored to be his wife.


A Home Complete

We both knew that we wanted a simple ceremony, and we wanted to be married on our property.  What better place than on our deck, overlooking the very same valley that started it all? When Dave asked me to be his wife, we were about 8 weeks from being completed with our home, if nothing went wrong.  We knew we needed to work even harder than we already were to make sure that we had a final inspection on April 8th, because on April 9th, we were going to unite our futures forever on our deck.  No pressure ~ but we accomplished our goal and met our timeline! 🙂

DSCN1776
Our County Building Inspector ~ He was our biggest advocate!

After 10 months of construction, a brain hemorrhage, hundreds of hours of therapy, and blessings beyond measure, we were awarded final occupancy on April 8th, 2016.  We moved most of our household items in that day, but didn’t move in our bed. We wanted our first night in our new home as husband and wife.


Choosing Forever

Never in a lifetime of dreaming did I imagine that I was going to meet a man as hard working and tenacious as Dave.  Never did I imagine that I would not only help build, but live in a shipping container home in a valley that brings peace to my soul.  Never did I imagine what my future would hold when I said, yes, let’s build a shipping container home. Never, in this lifetime or the next would I change the past 5 years.  We have been so blessed and we have grown in ways that would not have been possible if we were still chasing the ‘Jones.’

DSCN1786
April 9, 2016

As we exchanged vows on our deck with our children present as witnesses, little did we know that our story wasn’t over, but really just beginning.  That the challenges and trials ahead would be almost as difficult as the ones that we had already overcome in the past 10 months.  Dave and I would learn that Joy was our only hope.


Choosing Joy

Joy is not always present.  You have to choose joy in the midst of the trial.  Joy is a choice. That is the biggest lesson that Dave & I learned over the last 5 years.  When you choose joy, life is not nearly the struggle that it could be. Yes, life is still hard.  There are still so many hard things that we have to face every single day. But together, choosing joy, we are better.

4 years later, we are together, in our tiny shipping container home of 406sq  ft, looking over our valley, feeling more blessed than we ever thought was possible.

I’ve come to the end of our build story, but our story really just began with that Certificate of Occupancy awarded to us on April 8, 2016.  It was only after we began our life in our valley together did we discover the real joy of That Tiny Life Love!

Hickle (54 of 62)
I’d Choose You All Over Again…

Still Choosing Joy

Jaimie & Dave


The Home Stretch – Transforming a Shipping Container into a Home

As we came down the final stretch of converting 2 cold, ugly, metal boxes into a legal home, I (Jaimie) knew we needed to be on our A game and get organized.  To stay on schedule for a move in date of the 2nd weekend in April, I reverted to my old friend, Excel to help keep us on task 😉 .

2016-02-24 20.45.12

When I emailed Dave my spreadsheet with everything organized by task and weekend/date to complete said task, he laughed initially, followed immediately with an, ‘Oh My.’  But, he quickly realized how valuable our schedule was so that we could efficiently use our time to finish up the required interior elements of our home of our home by the 8th of April.


Together Forever

In February of 2016, 8 months into our build and 6 months after Dave’s brain hemorrhage, he asked me to be his wife.  I will share more on that in the next blog 😉

We knew that if we were going to get married, we wanted it to be on the deck of our home.  We decided that we were going to put a date on the calendar and knew that we HAD TO HAVE THE HOUSE finished by then so we could start our forever together.


Transforming a Box into a Home

The foundation was poured, the containers were placed, the welding was done, the walls were framed, plumbing and electrical were in, insulation was sprayed, sheet rock was hung.  It was time for the final transformation of 2 metal boxes into our home.

And as I usually do, here is our creation in pictures 😉  Enjoy!

Our dream was becoming a reality ~ and we were on schedule for our together forever date of April 9, 2016.

Together Forever,

Jaimie & Dave

Featured

That Time ‘Living Big In a Tiny House’ Came to Visit Our Shipping Containers

Did you see the episode?  If not, you can watch it here https://www.youtube.com/watch?v=EZURIKHf6Es&t=7s.  Bryce & Rasa condensed our story into 16 minutes better than we could have hoped 🙂


Eek – We Blew Living Big in a Tiny Home Off

I remember that I had received a message request through Instagram early in 2019 from Rasa, Bryce’s partner the gorgeous soul behind the camera.  She had asked if we were interested in being featured on their YouTube channel. To be honest, I had never even heard of Living Big in a Tiny Home.  We don’t really follow the tiny house movement; we just live our best life every day in our own tiny home. 🙂

So when Rasa sent that first message and a couple of clips of what the video would look like, I have to be truthful when I say, I didn’t even open the links. 😦  I read her messages, told her I would let her know and then forgot about it all. Life was so busy in the early part of 2019 as we had just come out of a long hard winter and were dealing with some issues with a couple of our kiddos.


Thank Goodness Bryce & Rasa are Persistent

Fast forward 6 months, and Rasa reached out to me again.  She said that they had just returned to the states and would love to film our home.  At this point, I had still not ever watched or heard of Living Big, but I did take the time to click on her links and watch the video clips.  Watching what they produce, it seemed surreal that they were reaching out to us. We had never expected anyone to think our house was as amazing as we thought it was 😉

I responded that yes, we would be interested and to please let us know what they were thinking and their time-frame.  I didn’t hear from her again for a couple of weeks and so didn’t think much more of it. Like I said, it had seemed too good to be true, so it probably wasn’t true 😉  Later we learned that they actually film or travel to their next filming destination EVERY SINGLE DAY. No wonder she didn’t have time to respond back – Bryce and Rasa are so very busy sharing people’s homes and stories.

Late August, I received another message from Rasa asking if they could come and film our home the first Saturday in September – just 2 weeks away.  Dave and I talked about it and said, sure, why not. Let’s do this! knew that I needed to do some homework and research what their show was about and what to expect.  I clicked on one of their videos and then told Dave, this is a BIG deal. Look at these videos and these gorgeous houses that they film all over the world. Oh, my goodness.  What have we signed ourselves up for?!?!?!


We Are Just Ordinary People

We live in 2 shipping containers that we love, but it really isn’t anything special.  After watching just a few more of their videos, I knew that we needed to make sure our windows were washed and the dead lawn mowed and get our home as ready as possible! We tend to keep our home very tidy, but we do live in the woods, so bugs and leaves and spiders and all the dirty things tend to get everywhere all the time.


Is This Really Going To Happen?

Again, I didn’t hear anything from Rasa after we settled on the filming date in September.  Dave and I worked to get our home ready, but because of the ‘radio silence’ weren’t even sure if this was really going to happen.  We figured if it didn’t, at least our house was spick and span to go into the long winter ahead. 🙂

Saturday morning arrived and so did Bryce & Rasa – we couldn’t even believe that this was really happening!  They had driven from their previous shoot in Colorado just two days before. As soon as they got out of the car, we asked how they were doing, and Bryce said, ‘tired.’  Oh, my mama’s heart went out to these two lovely people that had chosen to drive from Colorado to our little town in Washington State to film our home.

Immediately Bryce started asking us questions and soon discovered that our home was more than just a couple shipping containers stacked like legos that we lived in.  We had a story. An amazing story of perseverance, joy, love, and hope.

Bryce and Rasa spent the better part of 2 days filming our home and listening to our story. They cared.  It was genuine and you could feel it. After the first day of filming, we asked them if we could take them to dinner.  We also offered our son’s room for the night as he was away at his grandmas. Bryce & Rasa ended up using our home as a base camp for the better part of a week as they traveled North & South of our home to film other tiny homes & stories.

During their stay with us we talked and laughed and learned so much about the tiny house movement and cooked and built a friendship. Bryce is a permaculture encyclopedia and Dave learned so much from him in a short amount of time.  Rasa is an amazing cook and made us the most delicious dinner right out of our garden.


Behind the Scenes of Living Big

Have you thought about how Bryce and Rasa live to travel and shoot so many tiny homes?  They literally spend the majority of their time living out of a rental car. They shoot or travel every day of the week for months on end.  They edit in the evenings and throughout the night to make their weekly episode deadlines. They shoot hours and hours of footage on each home they visit and condense it into 16 minutes. They own what they can carry in suitcases, for the most part.  They seldom get the opportunity to cook home grown meals and rest in a real bed that isn’t a hotel bed. They truly are angels sent to tell all of our stories…


Our Shoot in a Nutshell

I’ve read so many of the comments on the YouTube episode.  So many questions and because not everything can be included in 16 minutes, here are the highlights of what you didn’t see:

  1. We found our property on Craigslist from a private party for cheap.  When we purchased it, it was a goat trail along the side of the mountain.  Dave & I have done all of the landscaping ourselves, mostly by hand. We have rented a small excavator a couple of times and we had an old backhoe that didn’t have brakes and almost killed Dave 5 times, but mostly, we do things the old fashioned way – one rock or shovel scoop at a time. 🙂
  2. We pay for things as we go to continue building out our property.  We both still work the same jobs we have worked for years. Dave has been at his job for 29 years and I am an accountant and have worked for the same company for 9 years.  When we want to add a rock wall or a greenhouse, we can because we don’t have a mortgage. Because of Dave’s health, our home and property is our stay-vacation destination and we spend so much time enjoying the gorgeous valley we live in!
  3. We intentionally built with only 2 containers because we wanted TO BE MORTGAGE FREE when we completed our build.  We accomplished that. We love our home, but yes, building a home out of Shipping Containers is definitely more expensive than a traditional stick built home of the same size.  Live and learn 😉
  4. Dave has always wanted a shop – doesn’t every guy wants one?  In 2018 we built him his shop so that he can work on his projects and stay busy and active.  He has an enormous crane in there that is his pride and joy and everything he needs to keep his creative juices flowing and his mind as healthy as possible. 🙂  We have recently turned the living space in the back of the shop into an Airbnb when our kiddos aren’t home and to create passive income 🙂
  5. Our shoot was in September, so our seasonal creek behind our home was dry.  The ‘Ferris wheel’ looking thing is actually a water wheel that plays a ‘not so sweet’ melody during the rainy months. 😉 It is essentially a large piece of garden art made from a pipe reel, galvanized buckets and an old bicycle.  Dave loves to create!
  6. I didn’t intentionally do the majority of the talking.  Dave talked lots, especially in the beginning when Bryce and Rasa first arrived, but after a couple of hours he was tired and his words weren’t working as well.  You don’t see this because the video is actually edits that cut out his stuttering and loss of words and replace it with me explaining a lot of things. When Dave watched the episode, he just kept saying over and over – I am not the same man I used to be.  He sees how much he has lost. It is heartbreaking to see the strong man you love and admire and who is a hero in your world be so vulnerable and weak. I am glad that Rasa & Bryce protected Dave from the ugly comments that would have been made had they left all of Dave’s stuttering and difficulty talking in the episode.  A lesson to be kind always, because we don’t know what other people are battling.


Angels in Disguise

God gifted us with angels.  Angels that were wanted to share our story.  Dave and I told Bryce & Rasa, that while we were so honored that they wanted to film our home, it was our story of love and perseverance, even when all seems impossible that we wanted to share.  Our prayer was that if by sharing, we could touch just one person’s life, then it was all worth it.

Bryce uses the word amazing a lot.  Honestly, it is Bryce & Rasa who are amazing and the work they do to bring tiny homes and their stories to life, are a true testament to their selflessness.  Dave and I feel so blessed to have been able to spend a week with them. We were also able to learn how to support them in their journeys just a bit. As a Patreon supporter, we sponsored Bryce & Rasa for $1 per video or an average of $4 per month.  Being able to spend time with them and seeing the sacrifices they make personally so that they can share tiny home stories – let’s just say it isn’t all glamorous living out of a rental car and suitcase. You can learn more about being a Patreon here https://www.patreon.com/livingbig.  For those of us that love what they do, please consider sponsoring their work – Dave and I thank you, personally!

20190913_155955
Angels and friends…

Thank you, Bryce & Rasa for your love and friendship.  Until we meet again…

Beyond Blessed,

Jaimie & Dave


Featured

Building a Wood Box Inside a Metal Shipping Container Box

Finally!!! We were done (enough) with the outside of our shipping container home that we were ready to move inside and start creating a living space inside our cold metal boxes.  It was December and icicles hung from the roofs of our containers (literally). Shipping containers transfer condensation, and in our SW Washington location, there is so much moisture in the air, that we knew we were going to have to be very diligent as we built our interior to protect against future moisture and mold problems.


A Wood Box

Our shipping containers are structurally much stronger than a stick built home, for obvious reasons, and so we were able to use 2 x 4 material instead of standard 2 x 6 material to frame our home.  We were building our home to code and it was fully permitted. Our framed wood walls were 16” on center, standard code, but we needed to make sure that they didn’t touch the metal shipping container at any point.  To accomplish this, we used the D ring tie downs that are standard in containers and use bailing wire to stand our walls 1” off of our container walls.

2015-12-28 11.45.03-12015-11-20 13.43.082015-11-19 15.02.182015-11-19 13.20.48

2015-11-23 13.51.48

Laying Out Our Tiny Home

Our bathroom walls, and the stairwell framing were critical as we framed the interior.  Our cabinets were already purchased and in storage, as was our spiral stairwell. As we framed the bathroom walls, we needed to be very accurate so that the final design matched up to our pre-fabbed design.

This was a challenge, because we had laid out our interior and cut our window openings, installed our windows and frames, purchased our cabinets and fixtures all before Dave’s ICH.  Working through the same design 3 months later and checking and rechecking for accuracy was a difficult and time consuming process, but we accomplished it 🙂

2016-02-14 14.27.032016-02-14 14.26.21

2015-12-07 13.20.05


Electrical & Plumbing

Once our walls were framed in, we started installing our roughed in electrical and plumbing.  We did all of this ourselves and the reduced wall spaces (2 x 4 instead of 2 x 6) created some challenges,  At Least we only had 1 bathroom, a kitchen and a laundry area to plumb in 😉 Our shipping containers sit on a 3’ foundation, so we had plenty of room underneath the house to work on our drains and venting for our plumbing.

2015-12-20 09.35.362015-12-18 15.39.22

I wanted to make sure that we had plenty of electrical outlets in our home, and they are literally placed about every 5 feet on the interior 🙂  I had personally never done any electrical work, but by the time we were through, I had learned how to drill holes in the studs to chase wire, and installed most of the standard electrical outlets.  Dave installed the oven, dryer and hot water heater outlets and was an excellent electrical teacher 😉


There is one thing that we wished we would have known/realized during our rough in, and that is to we wished we have put a recessed electrical box/outlet in for our oven.  When we installed our oven during the final phase of the build, it would not sit flush against the wall. This could have been prevented if we had realized and installed a recessed box.  Just an FYI for you and something we wished we could have done over.


Spray Foam Insulation

Once our framing, electrical & plumbing were all inspected and we were given the green light to proceed, we were ready for our insulation to be installed.  This is something that we couldn’t do ourselves and had to contract it out. Prior to having the insulation installed, we rented an industrial dehumidifier and ran it for a week to dry out the interior of our shipping container.  Our wood wall studs were saturated with moisture, just from condensation in the air and we didn’t want that moisture sealed in once the foam was sprayed. Insulation is very expensive, and for our 400 sq ft, we paid $7,000 – ouch!  The insulation sealed the space between the metal container and the wood framed walls, and eliminates any moisture or condensation problems that we could have had.

2016-02-07 15.12.142016-02-15 17.15.13

We did run into 1 issue with our insulation installer – they failed/got lazy and didn’t shoot foam down into the walls space between our 20’er and 40’er.  We didn’t initially realize this initially, but once our sheetrock was installed and was drying, there was so much additional moisture inside the containers that the bottom of the walls started to mold within 24 hours.  We had to cut out the bottom of the sheet rock and also a 12” area around the perimeter of our bedroom floor to dry the area out. Thankfully, our insulation installer came back and sprayed into those areas. But oh my, it created so much additional work and set us back a couple of weeks as we had to fix their mistake.

2016-02-26 07.42.172016-02-26 19.17.10

It took us about 12 weeks to frame, rough in our utilities, pass inspections, dry out the interior, insulate and sheetrock.  It was a slow and tedious process, but there was such a sense of satisfaction we had from doing 90% of the work ourselves 🙂 Thankfully, Dave was getting better each and every day and our shipping containers were actually starting to look like a home!

Enjoying the journey…

Jaimie & Dave


The Brain Bleed That Re-Routed Our Shipping Container Home Adventure

Featured

The Miracles Keep Coming

Dave’s wave and attempt at a smile sustained me during the drive to the larger hospital 40 minutes away.  As the life flight helicopter took off and raced my boy south for emergency brain surgery to stop the bleeding in his brain and stabilize him, I stood for a moment on the top of the hospital roof and just asked God for peace.  And I felt it, immediately.

By that time, my sister, Shannon, was by my side, holding my hand and said she would drive me to the new hospital as I didn’t have a car.  As we drove, I called my children and our elder and asked to be placed on the prayer chain. Dave was being lifted up within the hour by hundreds of people and the peace I felt about the new, unexpected journey that Dave and I were now on, was surreal.  I didn’t know how this day was going to end, much less the new path we were on, but I knew that somehow, we were going to be okay.

Defying All Odds

I made it to the hospital in record time and rushed inside to check on his status, expecting him to be in surgery.  To my amazement and surprise, they directed me to an emergency room and when I walked in, there, my fighting man sat, in the bed as the doctors and nurses continued to monitor his neurological status and vitals.  A doctor introduced himself as head of neurology and said that while Dave was in critical condition, he was already stabilizing and they had not seen any increased signs of distress in the brain since he had arrived. He was not sure why Dave was was awake and not declining, or what the next 30 minutes or even the hour held, but at that moment, they were going to wait on brain surgery and fall into a watch and wait pattern.  Thank you, Jesus. It had been a little less than 2 hours since Dave had called me in distress, and now he sat here, amazing the doctors with his status.  Dave was not well, but he was alive – another miracle!

Reality Check

The doctor then pulled up the CT scan of Dave’s brain – the one taken in the last 30 minutes, Dave’s second of the day, on the imaging board in Dave’s room and showed us what we were dealing with.  I am not going to lie; seeing the size of the blood pool in Dave’s brain was terrifying. Hearing the doctor say that he shouldn’t even be alive, much less awake and coherent, was nothing he could explain.  He was hopefully optimistic that Dave would continue to stabilize and that the bleed would not progress beyond it’s current borders. It was currently almost 2” x 2” and laying deep in the left side of his brain.

image

As I looked down at my best friend, and then back to the image of his brain, tears pooled in my eyes.  Dave could still hardly speak, he had no feeling on his right side, his brain had an active bleed, but against all odds, I felt him squeeze my hand with his right one and say, I love you.  It was more like a pained whisper and the faintest of squeezes, but he was speaking, attempting to make his right side work, awake and so very alive!

Dave was stationed directly outside the nurse’s station in the Emergency room of the new hospital.  There was so much activity in and out of his room as they waited on pins and needles for him to take the turn for the worse that the doctors were all expecting.  But, Dave refused to give in to the sleepiness that called his name. He held my hand with his strong left one like it was his lifeline. He sat in that bed and refused to give up – to him, closing his eyes and going to sleep, even though he was so very tired, felt like giving up.  He refused to leave me!

After almost 5 hours of monitoring him every 10 minutes, accessing neurological function, another repeat CT scan and so much lab work trying to figure out what was going on and why this had happened, they notified us that they were once again going to be transferring Dave to another hospital – the 3rd one that day.  His insurance was Kaiser, and so they wanted to get him to the nearest Kaiser facility to continue monitoring him.  Thankfully, this time they were willing to transport him via ambulance and we got to ride together 🙂

Expecting Another Miracle

We arrived at the Kaiser hospital and they admitted him directly to ICU to give him one on one nursing care as his condition was still so unstable and very critical.  Within a few minutes of arriving in the ICU, the neurosurgeon arrived and assessed Dave’s current status. Dave had not shown any signs of decline in the past 5 hours but the size of bleed that he had experienced in the location of the brain that it had occurred was very much life threatening.

The doctor gave it to us straight. He didn’t understand why Dave was even conscious, much less coherent. In his experience, these types of bleeds had a very small survival rate. If Dave made it through the night, we would re-access in the morning and do an exploratory brain operation to see if they could identify the source of the bleed. If there was a sudden turn for the worse in the night, they would proceed with the emergency brain surgery, that thankfully had been postponed for more than 8 hours at this point.

Because of the paralysis that Dave was experiencing on his right side, he wasn’t allowed any food or drink.  They needed to do a swallow study and have the feeding therapist evaluate him to minimize the chances that he would choke on anything orally.  Also, because he may have surgery at any moment, they needed him prepared and ready to go under anesthesia.

It was going to be a long night, but I pulled a chair up right next to my best friend, grabbed his hand and we settled in to watch and wait and pray.  Finally, after almost 14 hours since he had first called me, Dave let himself rest. I didn’t sleep at all that night – praying constantly that Dave made it through the night and defied the odds that the doctors were putting on him.  ‘Please, God, let Dave live.’ That was my prayer and the miracle I was expecting. I didn’t even care at that point that he ever walked again, I just couldn’t imagine life without him.

New Adventures Ahead

I had no idea what the future held as I sat in that hard hospital chair and held Dave’s hand throughout the night.  The home we were building, the future we had envisioned, the dreams we were chasing – that all seemed so distant as I looked around at the multitude of machines monitoring Dave’s every breath and heartbeat.  I didn’t know what this new adventure looked like, but I knew that we were going to experience it together…

2015-08-20 22.31.07

Still adventuring…

Jaimie & Dave


Shipping Containers – Are They Really Just Giant Oversized Legos? Part #6

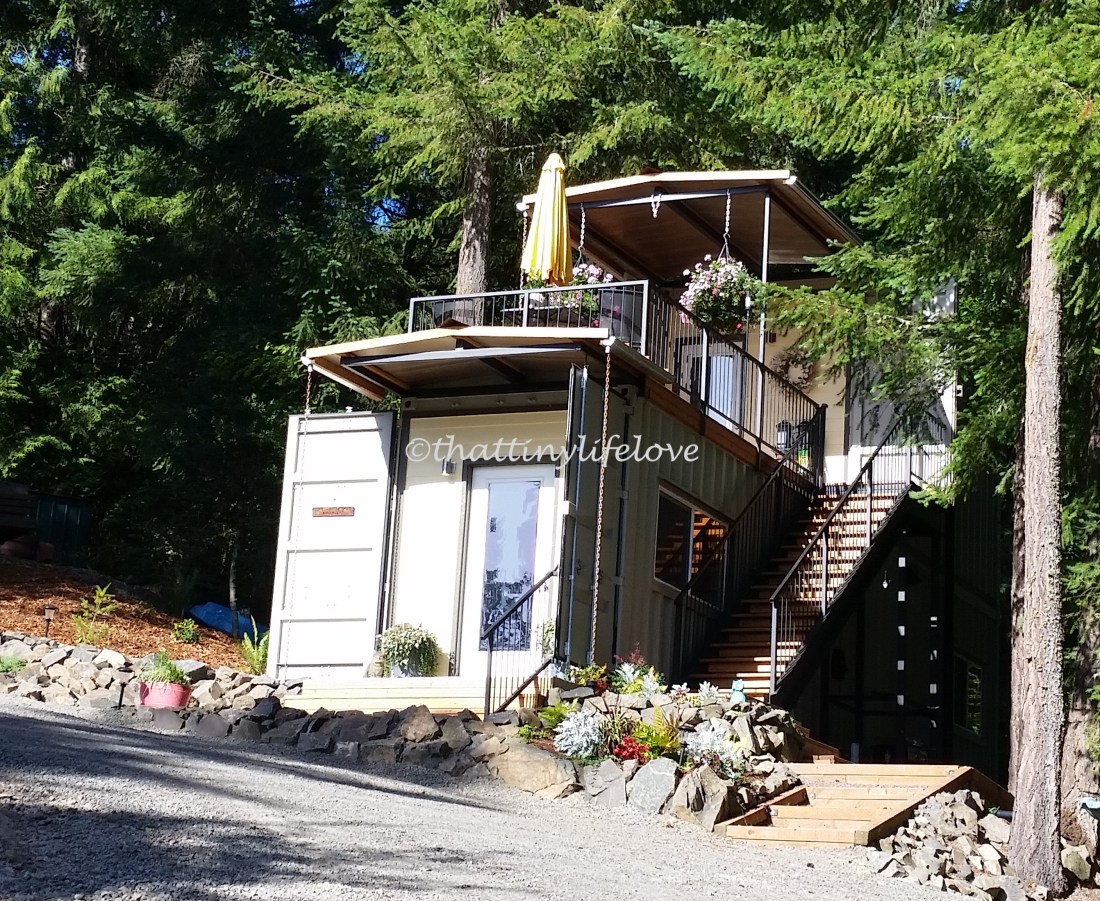
Friends – for those of you who have read our story to this point, I apologize for the long delay between this and my last post.  We have been so busy these past 6 months LIVING!!! That’s one of the perks of tiny living; it means you get to REALLY LIVE 🙂 I will write more later on our many adventures and additions to our property, but for now, the OCD in me is requiring that I continue telling our story and how we built ‘That Tiny Life Love.’


Legos?

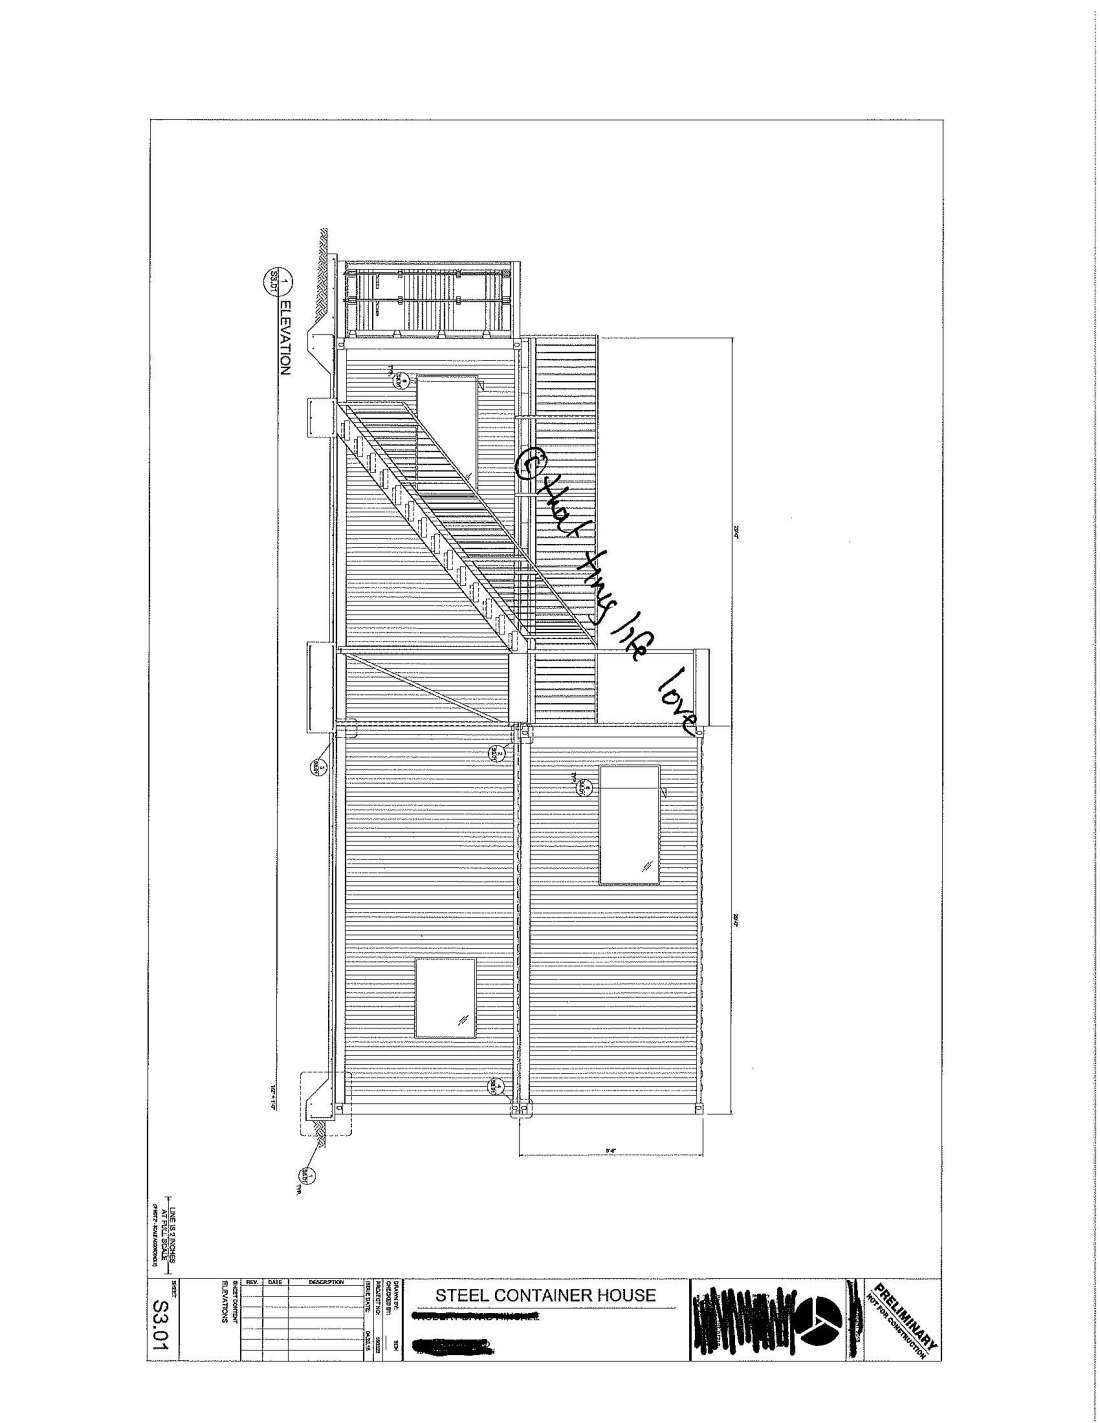
To start, I think that many people, us included, think that building with shipping containers is a lot like stacking Legos.  In reality, it couldn’t be further from the truth. I can’t tell you how many times people have said to us over the years – ‘Well, at least you can just stack up a couple more when you want to add on or remodel.’  Since we built our home, we have seen where there were added features to a shipping container home that allowed for the possibility of a future addition. Unfortunately, we didn’t know this information when we built our home, and so our home is not easily adapted to additional square footage.  If we could do it again, we would have put in a floor to ceiling style window that could be have been removed and acted as the transition between our current containers and a future addition. But, as our home sits, it would take an unreasonable amount of work and welding (welding that would create a huge fire hazard because of our insulation) that makes adding ‘Legos’ onto our home unfeasible.  And that is okay – but I am glad that we have gathered knowledge and information over the years to possibly help others along the journey of their build 🙂

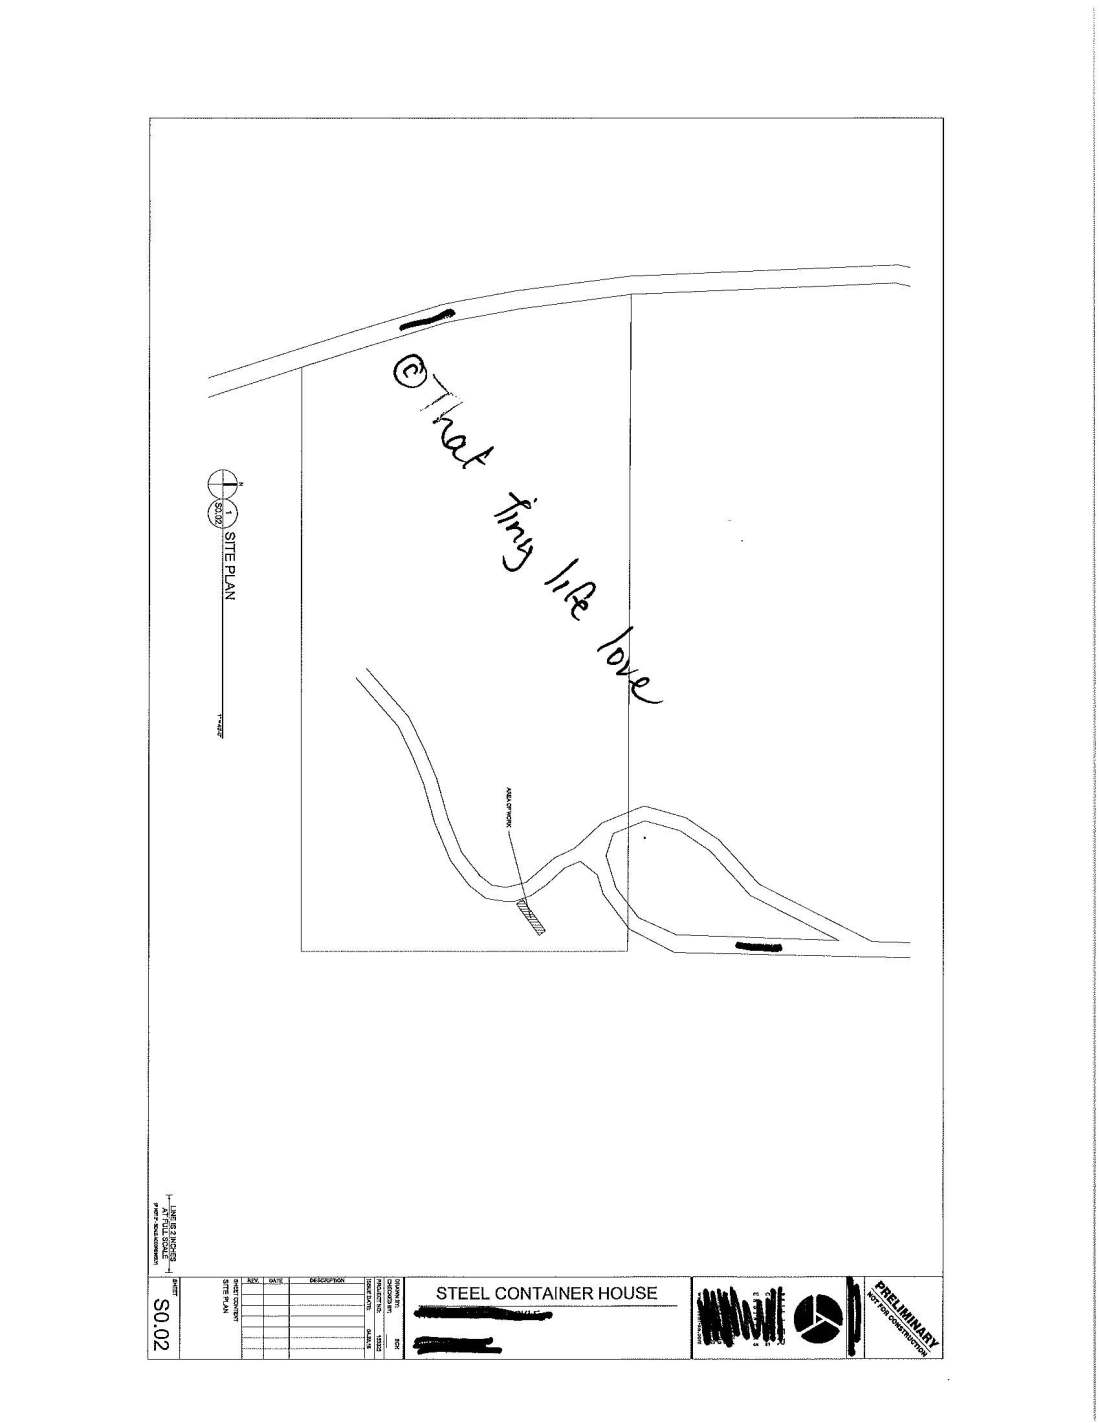
Well, we finally had approval and after almost 8 weeks of design and engineering, we honestly felt that getting our building permit in only 3 weeks after all of the hoops we had to jump through was a sign of good times to come!


Choosing our Shipping Containers

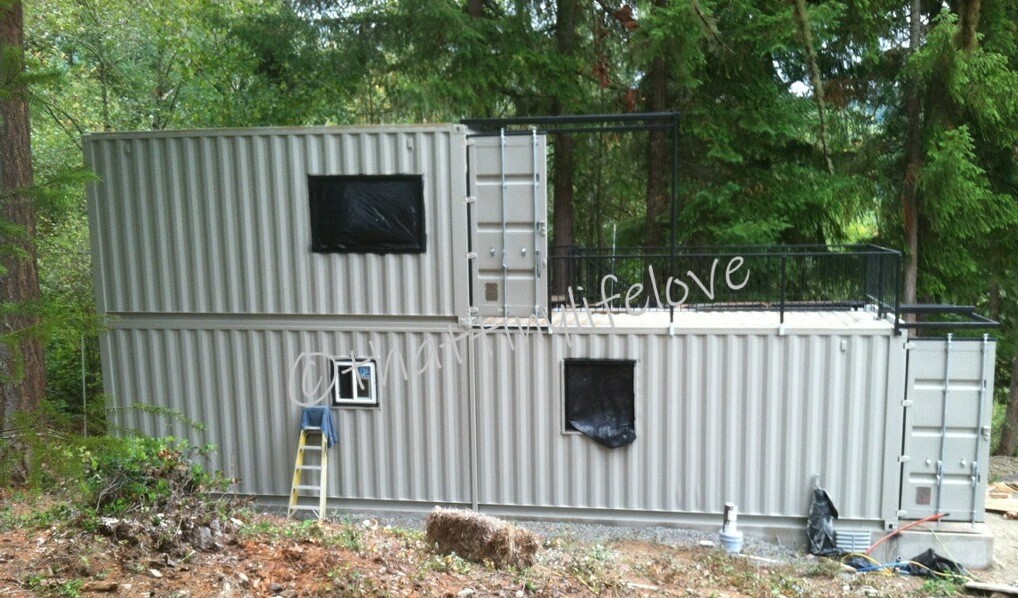
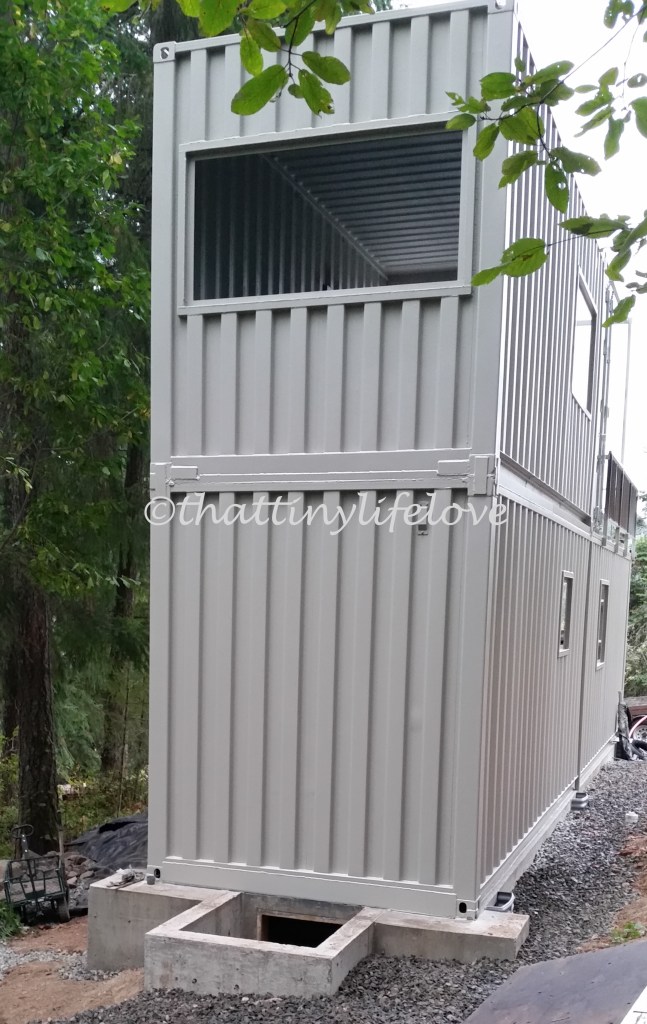
As I’ve mentioned in a previous blog post, our structural engineer recommended that we purchase (1) tripper containers.  For those new to the shipping container building world, it means our containers only made 1 trip across the ocean. Some of the benefits of these ‘newbie’ travelers included less dents, more structurally sound, less rust and easier acceptance by your local B&P, just to name a few 🙂  Another thing that we decided on when choosing our containers was to go with high cube containers. This added additional ceiling height and helps our home feel much larger than it’s 83” finished width.

2015-06-26 18.01.36

We purchased our containers from a local shipping yard in the Portland Oregon area, as it is only about 50 minutes from our home.  Once again, we worked well with our sales guy and he gave us outstanding customer service and hand picked our containers after learning that we were using them to build a home with.  We met him onsite and looked over the containers he had available, but there was only our 20’ that would work well for us. He spent the next week looking over all of the containers that he received to find us the best 40’ container he could find in his inventory for our home.  4.5 years ago, when we started this journey, building homes with them was still pretty new in our area and so, once again, there was enthusiasm from the people that we worked with to help us succeed in our dream of building a home! He also helped coordinate a great trucking company that was willing to deliver them to our hilly, goat country property.

Side story – when our 40’er (1) tripper was delivered to our property,  it already had a ‘skylight’ in it. Mind you, we had just paid 2x as much for it and bought them on the recommendation of our engineer from a reputable dealer.  The container had been damaged when loading and their was a 8” x 8” hole in the roof. The dealer sent his mobile field team to attempt a field repair at our property, but were unsuccessful. Unfortunately, they had to reload the container and haul it off for repairs. As I mentioned earlier in our story, our property is a rocky goat trail on the side of a cliff. It was an anxiety ridden day the day the containers were dropped off and even more so when they had to reload the damaged container and haul it away for repairs.  I prayed – a lot that day! Thankfully, it was re-delivered a week later, good as new. An early lesson for us that no matter how much you plan and what you pay, we weren’t really in control of the process, we were just trying to mitigate the outcome to our benefit.


The Schedule

I am a planner, and we wanted our containers delivered around the same time as our foundation was going to be formed and poured.  Our foundation needed to cure for 30 days prior to placing any weight on it, and we knew that we could use that time cure time to modify the containers per our design.  We received our building permit at the end of May, our foundation was poured on June 28th and our shipping containers were delivered on June 29th. Things were happening fast, and it was starting to get really exciting – and really hard.  Working with metal and steel is dirty, exhausting, hard work. Maybe not for you life long fabricators, but for desk jockey accountants like myself, it was back breaking work! My learning curve was steep, but my hubby was patient (kind of) and I quickly learned how to cut, grind and prep steal for the welding process.
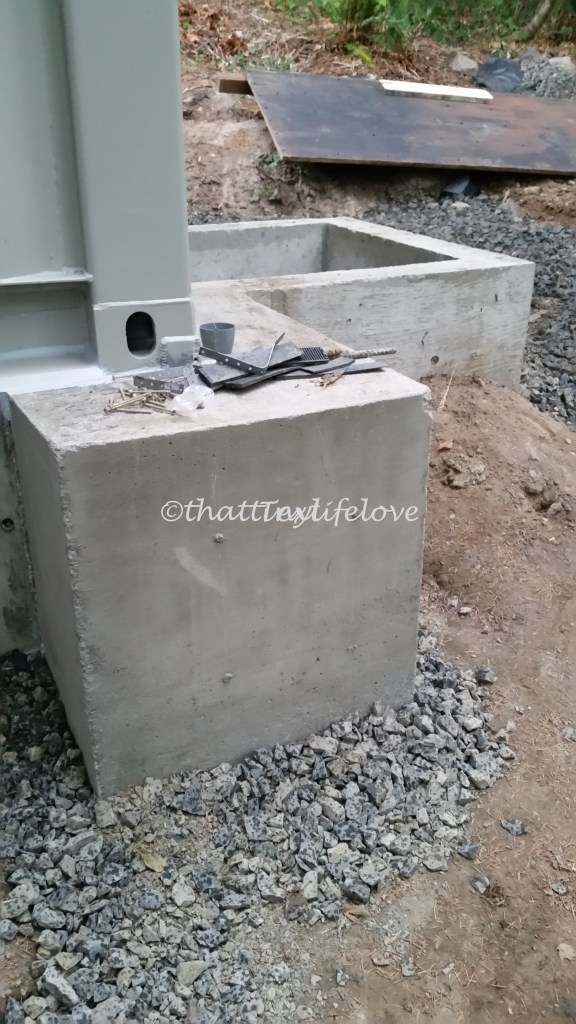
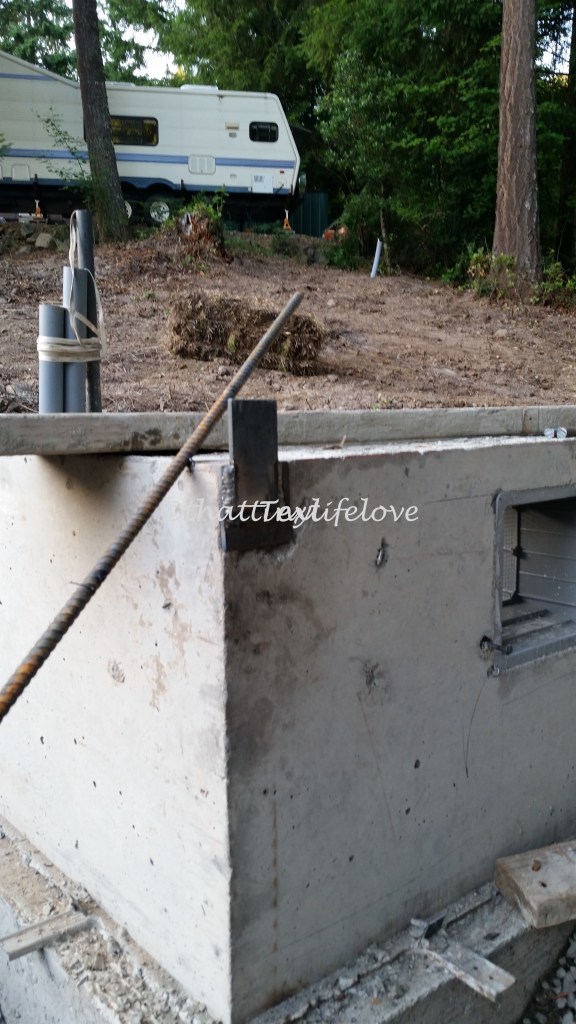
 

The Foundation

We hired a local company to form and pour our foundation.  We decided to go this route, because after doing the math, we realized that after we purchased the form material, did the extensive homework necessary to learn how to form our foundation correctly and then spent many, many weekends laying it all out, we realized that we could hire a professional, and they could have it done within in a matter of a week or two, for only slightly more than we would have paid doing it ourselves.  Sometimes, even diyer’s have to accept that there are better and more cost effective ways of achieving your goal 😉

Once the foundation was poured and as it was curing, it was time to start fabrication on our containers.  Most of these modifications could have been done by the company that we had purchased our containers from, just and FYI, but we wanted to be hands on and do the work ourselves.  Also, we thought it would save us time and money to do the work ourselves. In hind-site, it probably didn’t save us much, just another lesson learned along the way.


The Windows

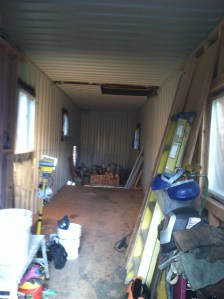
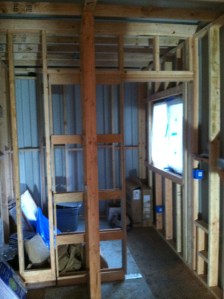
The first order of business once the containers arrived was to remove the cortex siding for the window placement.  What we quickly learned is that once the cortex is cut, the structural integrity of the containers are VERY compromised.  It took little or no effort to have the entire side of the container ripple in the wind once just one window panel was cut.  We knew that we couldn’t move the containers again or place them until we had reinforced the containers with our window design.  We had A LOT of work to do in the next 30 days to get these ‘Legos’ ready to set in place!

Remember the old saying – measure, measure, measure and then cut?  Good advice. As our entire home had been designed within inches, it was vital that we measured and removed the container wall exactly where we planned on placing a window.  After measuring, we created a cutting template with blue painter’s tape and used a grinder with a cutting disk on it to cut the steel. Once we removed all (7) window panels of differing sizes, it was time to start reinforcing.

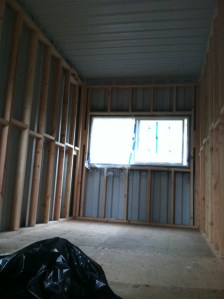
The window frame design was my husbands, and our engineer signed off on it.  To create the window frames, we used 1.5” tube steel and 1.5” angle iron. We had purchased all of our windows at this point so that we had the exact finished dimensions of the windows themselves.  Again, for those like myself who had never worked with metal, metal isn’t like working with wood and you can’t ‘recut’ or ‘wedge’ any errors. It has to be right the first time – thankfully, my hubby is very OCD about these things and I was confident that our windows would be exactly where we wanted them 🙂

After we had the exact dimensions of the windows, we fabricated the tubing into a rectangle, allowing for the thickness of the angle iron.  The angle iron was welded to the inside of the tubing to create a ‘lip’ for the window to sit on and be attached to when the time came to install them.  When we cut out the cortex siding from the container, we cut out our template allowing for the dimensions of the tube steel and angle iron, so approximately an additional 1.625” on each side of the window. Example, if the finished window dimensions was 24” x 24”, the opening that we cut was actually 27.25” x 27.25”.  We then built this back up with our 1.5” tube steel & ⅛” angle iron to create the finished opening of 24” x 24” that we could attach our window too. I know – as clear as mud 😉

To fabricate the window boxes, my husband welded the tube steel into a box and then welded the angle iron inside of the box.  He welded both sides, front and back so that there was a complete weld all the way around. This allowed for a watertight surface since this was our finished product and we weren’t going to side our container.  Cortex is a challenge when welding. It has a low melting point, and can be difficult to attach to. To successfully create the window openings, Dave first welded cool on the inside of the window opening (inside the container).  This held the frame in place and secured it. He then moved to the outside of the window and welded completely around the tube steel frame to make a weather tight seal. Essentially, each of our window frames were welded 4 times – a long, tedious process, but completely worth it!  We have been in our home for 3 full winters now, and we live where it rains and is windy 9 months out of the year and we have had no water or moisture problems around our windows or the frames. Word of advice – Don’t cut any corners; take your time and make sure you have an airtight seal – you will appreciate that you don’t have any mold, mildew or moisture problems later 🙂

During this part of our build, my husband and I were both working our ‘day’ jobs.  My, but those really got in the way 😉 We would work Monday – Thursday at our paying jobs, and then work 12-16 hours Friday to Sunday on our home.  It took us every single working minute of 3 weeks to fabricate our window wells and prep for the placement of our containers. Hard work, but because of the tiny footprint of our home, there was an end in sight.
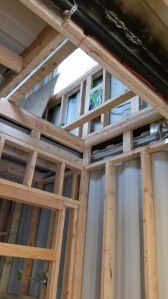
 

Sealing the Gap

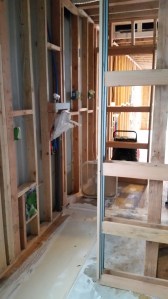
One of the challenges we were facing was figuring out how to create a weather-tight seal between the 2 containers.  Our containers would be open up to each other through the roof/floor section for our interior stairwell. Our engineer had written into our plans that there would be a cedar ‘faux’ sill plate and Volcom caulking between the 2 containers to see the air gap.  We spent an entire day, laying out this per design on the back 20’ of our 40’ shipping container in preparation of placement. Unfortunately, the reality we discovered after placing the containers, is that this sill plate was not going to work as designed. And so, after the containers were in place, we began the hard job of chiseling out the cedar wood and volcom caulking between the 2 containers.  What we ended up doing to make our containers weather and air tight between the 20’ and 40’ers was to weld an 8” piece of flat plate as a band around the 2. This not only sealed them completely, but looked much better than what our engineer had designed. Common sense, and onsite problem solving are so important when building a home that is not traditional. Don’t be afraid to think outside the box when building tiny!
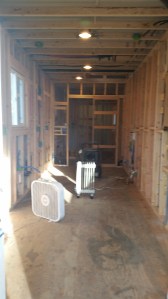
2015-07-12 11.39.15


The Sub-flooring

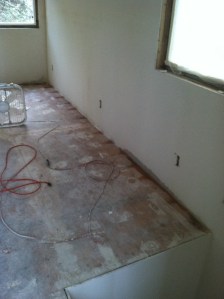
The final step in preparing our containers was to address the pesticide soaked marine plywood that come standard in shipping containers.  While this floor is stout, and already there, we were concerned about future health problems if we left the plywood as it came. There would be absolutely no way in the future to remove our subflooring if it caused health problems, and we were pouring way to much of our heart and soul into our home to take any chances that it wouldn’t be livable for us in the future.

2015-05-29 08.31.31

Decision made – we removed it ALL.  Every last bolt and washer and 1-¼” piece of the heaviest plywood you have every carried in your ENTIRE life.  (This stuff still lives on at our property for various hard tasks, and so I am occasionally called on to assist with moving it.  I usually give my hubby the stink eye when he asks me – this stuff is that HEAVY 😉 ). We didn’t replace the sub-floor prior to placing our containers on our foundation, but by removing it prior to craning them into place, this lightened the overall weight of our containers. The containers have C-channel or I-beams along the bottom, so removing the sub-flooring didn’t compromise the integrity of the containers – not like cutting out the windows did :).

2015-06-20 20.39.46

Next up – placing our future home!  I know this I am covering a lot of information, but for those of you that are considering a shipping container home, I wish that we would have had the information I am sharing when we started.  There is so much that we had to learn along the way, and if we can help even one person, then everything I am sharing is so worth it!

Comment or send me a message and let me know if this information is helpful 🙂

Until next time ~ keep chasing your dreams!

Jaimie & Dave


Permitting A Shipping Container Home, Part #5

Featured

The Rejection

They already knew us; we had been talking for weeks.  They had assisted in some critical design pieces. So, when the BIG day came and we headed to Building & Planning and attempted to submit our design and supporting documents to build our shipping container home and were told NO, we were shocked.  They had ‘dropped a surprise bombshell’ on us. To cover themselves, I am sure, they were requiring a structural engineer to provide calculations on the strength of our sheer walls and container.  They wanted to know if they would be strong enough to be a home. Hello, they are metal boxes!!! Of course they are strong enough.

Seriously?!?!?

Why hadn’t they mentioned this before? Would it have deterred us from our goal? Probably not, but still – nothing like last minute notice and a huge delay.  Couldn’t they tell we were beyond ready to start building our shipping container home?

This was our first real lesson in the expense of building an unconventional home. This is when people & the internet say, ‘It’s cheaper and more cost effective’ didn’t really feel cheaper or more cost effective.  Thankfully, Google was already my friend and had gotten me out of a jam on the spiral stairs, so I knew Google had my back 😉

I immediately started researching an engineer who had taken on other similar projects – none were to be found within a 60 mile radius of our home.  I dug deeper. Google’s game was strong. What I found was a couple of news articles about an structural engineer who had taken on an impossible ‘Tree House’ project in our county and gotten it to pass through B&P.

Within days of being told that we needed an engineer, I contacted his firm and shared with him our dream.  He graciously agreed to take on our project, even though his schedule was full. The only hiccup – he wanted a small fortune. Now remember, I already had the entire home designed to the inch, I just needed the calculations.  He initially informed me that it would be $9,500 for the calculations and design. I countered that I only needed the calculations on my design. He finally lowered his price to $5k – for the 4 structural points, the 8’ wide sheer walls and the foundation. The bare minimums that the county was requiring. If we weren’t already so emotionally invested in our home build, this would have been a good time to run for the hills.  But wait, we already had rocky, goat trailed hills that we owned – we owned the hills 😉

12

In reality, the engineer took a real fascination to our build – probably, because once again, we built rapport with him and he liked us 🙂  Told you, it never hurts. He advised us to purchase (1) trip containers for our home -meaning that they had only made (1) trip across the ocean.  This helped to ensure that the containers where in as new as condition as possible, validating his calculations. While this wasn’t an expense that we were expecting, purchasing containers that were very structurally sound, with little or no dents is something we have never regretted. (1) trip containers cost more than 2x as much as multiple trip containers and so we paid almost $10,000 for our home’s outer metal shell.

My Homes Stronger Than Your Home

The truth, according to my very expensive engineers calculations, is that our home is almost 5 times stronger than a wood built home.  Not sure why B&P doubted 😉 My baby sister showed up shortly after we had our containers delivered and said – ‘your house is rusting (there was a rust line on the side from metal welded to the top)’  I responded with ‘your house is rotting and I guarantee that your house won’t still be standing in 100 years, and mine will still be standing in 500 :)” Our home is strong and really will be standing right where it is today, long after we are gone. Those ridiculous and expensive calculations just proved it.

The foundation Design


The engineer designed our foundation based on our input.  We wanted room underneath to work on and install the utilities.  We ended up with a 3 foot foundation that our containers sit on, leaving a large crawl space under them where all of our plumbing and venting are located.

2015-06-17 17.58.242015-06-22 20.25.40

Side note – What the engineer didn’t take into account, and what we never told B&P because we fixed it before it was inspected, was that the foundation was inadequate for our containers.  A container does not have the weight dispersed evenly along all four sides. There are 4 feet, one in each corner that hold all the weight. When our container was placed upon our foundation, instead of the weight being dispersed along the length of our foundation, it was centralized in the four corners.  The front of our foundation has a 4’ x 8’ x 3’ concrete slab that helped to support the front of the container weight on the front 2 feet. But in the back, where there was no additional slab and the weight of the 20’ container was also placed on the back 2 feet – our foundation failed. Within a week of placing our containers, the back of our foundation was cracking and settling.  

2015-09-20 10.53.002015-10-02 18.17.28

But, we are problem solvers – especially my husband.  So he went to work fabricating a corner support for both the inside of the foundation and the outside.  It looked like something right out of the movie, Mad Max. He then drilled and inserted rebar into the foundation at the back corners and built a grid of rebar around his metal support.  Once this was completed, he formed it in and we re-enforced our foundation with an additional yard of concrete at each corner. Additionally, we installed wedges or spacers along the entire length of the container that filled in the void and placed positive pressure between the concrete footing and the metal I-beam.

Foundationfoundation2

Another hard lesson learned, but thankfully we were able to isolate and fix the problem before B&P discovered it.  They would have forced us to remove our containers and re-engineer and

Securing The Containers To The Foundation

Unlike a traditional wood home, there is no ‘sill’ plate when placing shipping containers on a foundation.  A sill plate is the mechanism that is used to secure a stick built home to a traditional foundation. In order to secure our bottom container to the foundation, our engineer called out for (4) 4″ x 2″ x 1/4″ flat plates, bent and welded to a piece of #5 rebar. One for each corner. The rebar was to be placed inside the foundation prior to being poured. Once the foundation was poured, the plate would be welded to the 4 corner tabs of the bottom container. To attach the upper shipping container to the bottom shipping container, the same size tabs (excluding the rebar) were to be welded in the 4 corners of the 20′ container.  Obviously, they needed to feel confident that the containers were not going to move, but sheer weight alone will hold them in place 🙂 I am not sure the small pieces of plate are doing much good, but at least everyone at B&P could feel better about our build.

Foundation1

The Exterior Stairs

Totally overkill – ridiculously large, heavy and expensive.  But the engineer added them to our exterior design as additional structural support and we fell in love.  They are fabricated from a solid piece of 12″ C-Channel. Dave & I spent 3 days of his vacation in July building those stairs at his job.  His employer is awesome for letting us fab them there – because they were entirely too large to fab them on our hillside.  Once we had the frame constructed, we loaded them with a crane and hauled them home on our triple axle trailer.  On the day the huge crane lifted our shipping containers in place, it also ‘flew’ our stairs across the skyline and set them on the custom slab built for their mammoth weight.  Complete overkill – and one of our favorite features to the exterior of the home 😉

stairs3

Second Attempt & Another No; WABO Certification

Our engineer’s firm was awesome and fast-tracked our calculations.  Within 2 weeks of contacting his office, we had our structurally engineered plans in hand.  All of the requirements that B&P had requested were addressed. Calculations, foundation and securing the  shipping containers to the foundation. We were ready to try again for our building permit. So back we went… But you guessed it – rejection 😦

Our welding had to be done by a WABO certified welder.  That was the other curveball they threw at us. Would the curve balls ever stop?  Lucky for us, my husband had been welding for over 25 years and once upon a time, he had been WABO certified.  The job he was currently doing and had done for the previous 5 years didn’t’ require that qualification. But, again, refusing to give up, Dave got to practicing and after a couple weeks of 1” thick vertical test plates, we arranged for him to take his WABO exam at our local college.  SUCCESS!!! On the first attempt – the man really is my hero 🙂 Dave was officially WABO certified, again – yet another obstacle removed!

WABO2

Third Time’s The Charm – Or Not; Third Party Inspection

Seriously, would the crazy requirements ever stop. It seemed that each time that we went back into our planning department with the previous requirement met, they handed us anther.  The newest one – we would have to have all of our structural welds inspected by a certified 3rd party welding Inspector. Not to be deterred, Google will forever be my friend. Thankfully, I found a local Certified Inspector who was also an instructor at the college. He agreed to inspect our welds for the County per their request for a nominal feel.  Take that B&P – Nothing is going to stop us from reaching our dream of building a shipping container home!!!

Fourth Time & Finally, Success!!!

After jumping through their design hoops for our stairs, paying $5,000 for a Structural Engineer, WABO certification and finally retaining a Certified Welding Inspector, Building & Planning accepted our permit fee and our plans.  In our County at the time, it was taking on average 60 days to receive a building permit. Maybe making friends with the county helped, maybe it was sympathy for all the obstacles they put in our path that we refused to succumb to… regardless, our B&P came through for us and within 3 weeks we had our building permit in hand and were ready to start. The time had come to make our dream a reality.

To be continued…

Chasing our dreams,

Jaimie & Dave


The Goal = Turn Two 8’ Wide Metal Boxes Into A Shipping Container Home, Part #3

Priority #2 – The Kitchen

Every woman wants a kitchen to call her own, especially a mother.  It’s her space, whether she is a gourmet chef or simply trying to feed the kids. Dave and I have 5 of those amazing big people together, and while 4 of the 5 aren’t living at home, I still wanted  to try and have a space where they could come and enjoy a home cooked meal. My kids thrive on mom’s cooking and not making room for their needs in our tiny home, even when they were older and no longer living with us, just seemed selfish.

Have you ever looked around at your kitchen – there are so many needed spaces. Counters, sink, cupboards, fridge, range, venting, windows and even more. I am a lazy woman in the kitchen and cooking and cleaning up after preparing a meal just is not my favorite thing to do.  Thankfully, my husband has taken over this chore for me in the past couple of years, God bless his heart. But in my laziness I knew I wanted -no, needed, a dishwasher. We may be planning on living in a shipping container, but priorities, people 😉

20150808_184248

Because our finished inside footage was going to be less than 7’ wide, I decided early on in the process on a galley style kitchen.  We were able to use standard size cupboards on one side of the room that encompass a large bar/seating area that gives us 32” x 48” of open counter space.  We can have 5 people at the counter for dinner, and while it is cozy, it works and that makes it perfect!

2015-11-29 12.45.512016-01-15 15.29.09

2016-02-13 14.20.03

In my research, I found a tiny family owned stonework store about an hour from our home.  While looking for countertops, I found a large, deep rectangular sink. I knew as soon as I saw it that is was perfect for our home.  The store was family owned and were more than happy to come and install our custom countertops and sink for us. They showed up on a Saturday in their little van and set up an outdoor cutting station.  They then came in and inspected our pre-work and told us it was terrible – no kidding. Funniest thing ever, because we took such pride on our craftsmanship. But apparently, to them, it was terrible. So after about 30 minutes of completely re-working our underlayment, they brought in the granite slab to cut and sand and router and make every single piece to fit perfectly for our tiny build.  If we ever build again, we will use them to build our entire kitchen. Look for family owned stores if possible. They take pride in their work and you aren’t just another number.

20160214_1425512016-02-14 14.26.32

I know I have mentioned that dreams do come true.  I have a tiny kitchen with a full size dishwasher and a full size oven range. Over the range is a microwave hood combo unit that sits in an upper wall full of cabinets. At the end of this length of counter and appliances, I got really creative.  Our cabinets are stock cabinets that we purchased from the local hardware store.(Trying to do things on a budget and they were hickory, which I love!) I took 3 of the standard sized cupboards and stacked them on top of each other to utilize the space we had left over and also provide us with a pantry/small appliance cupboard.   

On the opposite side of the kitchen space, is our fridge/freezer.  Now, there are so many options for appliances and while you usually would choose your appliances towards the end of a traditional home build, when you are building custom and tiny, you need exact measurements to utilize every single inch of usable space.  While shopping appliance options, we discovered that we could purchase a ‘counter depth’ fridge. This meant that instead of our fridge sticking out 6” past our counters or into the walkway, it is recessed back allowing for a wider walkway 🙂

Next to the fridge, I have a full size stackable washer and dryer.  Mama is happy!

20160217_162925

All of the appliance doors open, except for our oven door which is about 1” short of opening up completely.  This was a beginners error on our part and would have been an easy fix if we had realized during the framing part of our project.  FYI – install a recessed range outlet. This allows for your range to sit flush to the wall, not protruding into the room an extra 1”.  Once completed, our galley kitchen has a walkway of approximately 23”. Legal walkway is 22” – so we meet that requirement 🙂

Side note – In a traditional wood home, you can cut in microwave and dryer vents and install them fairly easily.  Want to add a window over the sink or a door, no problem, just cut out the desired space. With a shipping container home, every single opening that we would need in the metal had to be pre-planned, pre-measured, pre-cut, pre-grinded, pre-welded, pre-finished.  Every single opening had to be created and finished prior to starting any of the interior work. This included the wood framing, insulation and sheetrock. All of these are combustibles, and because welding and grinding is such a hot process, we couldn’t take the chance of a fire later in the process.  As an example, when we originally laid out our kitchen we had almost 3” from the end of the upper cabinet to the edge of the window that was centered over the kitchen sink. When we actually installed our cabinets, we had less than an inch between the two spaces.

2016-03-05 11.41.422016-03-05 18.35.59

20160306_1706182016-03-06 17.21.02

2016-03-12 11.35.53

Now, there are lots of reasons that measurements were off slight.  Our biggest obstacle that we had to overcome between the design stage and the building/installation stage, was my husband’s spontaneous ICH that occured mid build.  In wood construction, these slight deviations wouldn’t have been such a make or break issue. Wood is more forgiving, but with the metal, my husband had to be WABO certified to weld on our home.  It wasn’t so easy to find a replacement to step in and finish our build. With metal, when your measurements are off, there is simply no easy way to reinstall your metal Cortex siding and cut out another window.  

20160327_123133 copy

Each of the early planning steps we took to complete our build, especially in critical spaces like the kitchen helped make our project successful.  If we hadn’t of taken the time and paid close attention, I am 100% confident that we would not have such a beautiful home.

I know that I am giving a lot of details about each step, but I know that we saved ourselves so much time, money and effort on our project by designing and laying out each piece of our home to the inch. When your building tiny, inches really do matter.  On your build, take your time. Do your homework and measure, measure and measure again. I promise, you won’t regret it.

Here is a sneak peek into what our kitchen looks like today – enjoy 🙂

Kitchen2

If your chasing your dream of building a shipping container home or a tiny home, don’t give up!  It isn’t impossible – if it was easy, though, everyone would have one 😉

Catching our dreams,

Jaimie & Dave

The Dream = Shipping Container Home

They Called Us Crazy

In hindsight, we probably were a little crazy; or maybe a lot. But, everyone’s adventure has to begin somewhere, and this is where our’s began –

‘that tiny life love’

I remember it clearly – the day ‘that tiny life love’ story started – the day that my husband talked me into building a Shipping Container house on the 5 acres of rocky, hilly goat country that we had just purchased in southwest Washington.

Let’s Rewind

Do you ever just dream of something more?  Do you look around, or look at yourself in the mirror, or look at your bank account and ask yourself – ‘There has got to be more to life than this?’  That was us.  No matter how many hours we worked, or how much we saved, the constant challenge of keeping up with those around us just weighed us down.  We just didn’t want to do it any more; so we made a radical, life-changing decision to rewrite how our story was going to go.  Little did we know how little control we really had 😉

Our initial goal was to be mortgage free after building a tiny house on our new property.  We had a little nest egg saved and some basic skills.  My husband is a fabricator, so metal was right up his alley, and I, an accountant/controller, have never been afraid of a challenge and loved the thrill of problem solving and thinking outside the box (pun intended).  How hard could it be? ‘WE CAN TOTALLY DO THIS! No one else has, but WE CAN!’ – That was our pep talk to ourselves daily 🙂

It wasn’t very elegant – the start of this journey.  We spent months searching the web and reading every available piece of information on how to build a shipping container home.  And after all those months of research and learning, we were almost exactly were we started. Knowing next to Nothing about how to build a shipping container home!

Truth

The internet was about 5% helpful; meaning it was also 95% not helpful.  There are a couple of resources from other DIYers, but nothing that worked with what we wanted to do.  But hey, who needs an instruction manual on how to build a shipping container house?  How hard can it be to put 2 metal boxes together and make it livable?  And it couldn’t cost that much – I mean you can buy shipping containers all day long on Craigslist. Easy peasy! –

Our family was right – we were definitely crazy!  We will own that 🙂

Here is the honest truth; it was hard, and expensive.  I am not going to lie or sugar coat this part and tell you that it was no big deal, because it was a big deal.  It was really, really hard and very, very expensive.  But again, there was not much usable information available on just how challenging and expensive it was going to be until we were already well on our way.  And then we only figured it because we were living it.  Every evening after work, every weekend, every vacation day and holiday – yes, even Christmas.

We weren’t quitters.  This was OUR dream and nothing was going to stop us.  And we had our pride too.  Yes, you read that correctly – OUR PRIDE.  All the people who said it was silly, and crazy and there was no way we could live comfortably in the same box you see on the bed of a semi driving down the road – yes all those people who said it was impossible.  We refused to let them see us fail.  True, we could have taken the easy route and built an ‘off the grid’ container that would have been much cheaper.  But, we wanted to live in it and be comfortable and healthy while living in it; and all those corners that we could have cut meant things like – not passing inspections, mold and moisture problems, unsafe electrical, leaky plumbing, poor venting, pesticide soaked flooring – just to name a few.

Fast Forward Ahead 

And so, 10.5 months from the time we got the go ahead to proceed from our local Building and Planning department, we held in our hands our Certificate of Occupancy for a Single Family Residence.  We had done it – we had accomplished what we set out to do!!!

Not to shabby for an accountant wife and a fabricator husband who had a massive brain bleed mid way through our project, if I do say so myself 😉  I know that I mentioned how hard and expensive it was – did I forget to mention that my amazing husband had a major brain bleed in the middle of our project that left him with a 2″ blood clot on the left side of his brain?  So, when you add a life-flight helicopter bill and 4 days in the ICU to the cost of building our house, we realized exactly just how hard and expensive our dream of building a shipping container home had become.

That Was Where Our Story Get’s Really Exciting!!! 

That’s where we got to see miracle after miracle take place; the first one being that my husband LIVED after suffering his major ICH that left him with little feeling or sensation on the right side of his body and a seizure disorder.  That was where we got to see those same family and friends who said we were crazy step up and help us continue building our dream.  When my husband could barely walk or talk – they got to be part of something amazing too!  That is where we got to see God take our pennies and give us hundred-dollar bills and grow our faith by leaps and bounds.  That is where we got to see our persistence and never-give-up spirits keep fighting.  That is where we got to see exactly what we were made of and for…

God saved my husband’s life – period.  Our dream, our goal to turn 2 shipping containers into a house – that gave my amazing husband purpose to get out of that hospital bed and to work through 5 or more therapy sessions a week so that he could finish what we had started.  And finish we did!

That silly, crazy dream – it was just the beginning!  We thought we knew exactly what we were doing – we had it all planned out.  And that is the beauty of our story – that simple dream has turned into our new life’s story, and the dream is still growing.  Everyday, just like the flowers and vegetables infront of our 406 square foot home.

So, I Ask Again

What is your dream?  What are you working for?  Do you look at your life and ask yourself, is there more to this?  Our dream started as turning 2 shipping containers into a mortgage free house.  God took that dream and multiplied it and grew it by turning 2 shipping containers into a home.

So, welcome! We are glad you are here. In the past 4 years, we have learned so much about building and health and life and diet and living and loving. We can’t wait to share our story with you and invite you to learn as we do.  We will be covering lots of different topics like simple living, food, diet, exercise, chemical free options and we will continue sharing our story on how we got here and it all began with our dream to build a shipping container home. We hope you come back soon!

Chasing our Dreams~

Jaimie and Dave